Best Practices for Safer Ultrasound-Guided Vascular Access Procedures

Since 1984, ultrasound has been regularly utilized in a wide variety of vascular access procedures, ranging from ultrasound-guided central venous catheterization to femoral artery cannulation to arterial access. 1 2 Ultrasound's superior procedural advantages - combined with its cumulative benefits in terms of safety and success- make it a popular tool for practitioners conducting vascular access procedures. 2
Of course, no medical procedure is 100% risk-free, and when it comes to vascular access procedures, it is critically important that everything possible be done to ensure patient safety - including in those procedures that are ultrasound-guided. Below are several categories of ideas, all of which are easily implementable and geared exclusively towards helping to make your ultrasound-guided vascular access procedures even safer for your patients.
Part 1: Essential Pre-Procedure Preparations
When it comes to properly preparing for a safe ultrasound-guided vascular access procedure, the importance of choosing the right insertion site cannot be overstated. The site chosen for insertion can greatly impact the success of the procedure, as well as have significant repercussions on the patient’s overall health. Insertion points for vascular access procedures should be easily accessible, feature a stable and palpable vein, and be free of obstructions such as scar tissue or valves. 3 Failure to choose the right site can result in complications such as infiltration, extravasation, hematoma, thrombosis, or infection. 4 These complications can result in prolonged hospital stays, increased healthcare costs, and potentially life-threatening situations, making it crucial that healthcare providers take the time to fully assess and choose the best sites for their ultrasound-guided vascular access procedures.Also important in achieving safe vascular access procedures is cleaning the area of insertion with an antiseptic solution, which can help to reduce the risk of infection by removing bacteria from the skin surface. The most commonly used antiseptic solution is chlorhexidine gluconate, which has been shown to have a broad-spectrum antimicrobial activity while also providing long-lasting protection. 5 In addition to cleaning the sin surface, it is also important to ensure that the healthcare provider performing the procedure has clean hands and wears appropriate personal protective equipment (PPE) to further reduce the risk of infection.
Local anesthetics can be used to numb the area of insertion and reduce the patient’s discomfort during the procedure, with lidocaine being a commonly used local anesthetic that works by blocking the transmission of nerve impulses, thereby numbing the area. The use of local anesthesia can also reduce the risk of complications (including unintentional arterial puncture) by limiting patient movements during the procedure. 6 7
Part 2: Ensuring Safety During the Procedure
Tips on optimizing visualization while scanning using different ultrasound system features:
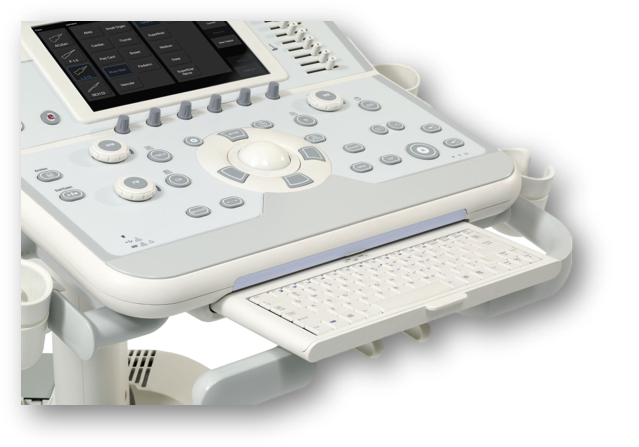
Knowing which buttons on an ultrasound machine to adjust - and when exactly to adjust them - is an important component of performing scans that deliver the clearest images possible for your patients while also ensuring complete needle visualization.
- TGC button:
Time gain control (TGC) button. Used to improve the gain of the image (i.e. the brightness), providing the user the ability to adjust the lightness or darkness at different horizontal levels within the image, allowing for a more uniform and detailed image that is easier to see.
- Depth button:
Used to adjust the depth of the image (i.e. specifically how deep the beam is traveling into the patient's body). Increasing the image depth allows the user to see deeper vessels more clearly while decreasing the image depth allows users to better visualize superficial vessels.
- Focal zone button:
Used to adjust the focal zone on an image (i.e. the area of an image that can help with lateral resolution, which assists with helping to visualize side walls and differentiating separate structures). There can be one or multiple focal zones at any given time within an ultrasound image - by using this button, focal zones can be moved as needed to help define individual structures.
- Frequency button:
Used to adjust the frequency of an image (i.e. the overall resolution). Remember: a higher frequency will result in an image that has higher resolution, but lower penetration, whereas a lower frequency will deliver an image with lower resolution, but higher penetration. The general rule of thumb for adjusting frequency: start with the frequency as high as possible, and after you have adjusted all of the other major buttons, lower the frequency until you clearly see the structure that you are trying to focus on.
Dynamic Range button:
Used to adjust the contrast/compression of the image. Raising the image's dynamic range creates more shades of gray while lowering it results in fewer grays and higher degrees of black and white. Lowering the dynamic range can be particularly helpful when trying to increase the visibility of the needle tip on the ultrasound image.
- Frequency button:
Used to adjust the frequency of an image (i.e. the overall resolution). Just as the frequency button can be used to enhance the overall quality of an image scan, it can also be used to lower the frequency, which can help to increase the ring-down artifact of the needle tip, increasing needle visibility within the image scan.
- Trapezoid button:
Used to superimpose three individual beams - straight, right, and left - in order to make a rectangular image look like a convex image. Allows for a clearer vision of the needle when using the parallel technique, due to the perpendicular reflection from the needle.
- 2D steer button:
Used to mechanically steer the beam, providing the user with more options on how to angle the beam towards the needle when utilizing the parallel technique. Allows the user a greater degree of control (albeit occasionally at the expense of overall image quality).
- One focal zone button:
Used to increase the frame rate of the image. For interventional procedures, it is usually best to have one focal zone, as multiple zones can potentially slow the image's frame rate, leading to scans that are choppy. Using a single focal zone will typically help to decrease lag in real-time scanning during the biopsy.
Two of the most common methods for conducting ultrasound needle guidance are the "in-plane" and "out of plane" techniques, with both approaches having distinct advantages and disadvantages, depending on when and how they are implemented. Below are brief breakdowns of both approaches, as well as some ideas for each to help you achieve the absolute best results for your patients:
Tip for optimizing your in-plane needle guidance approach:
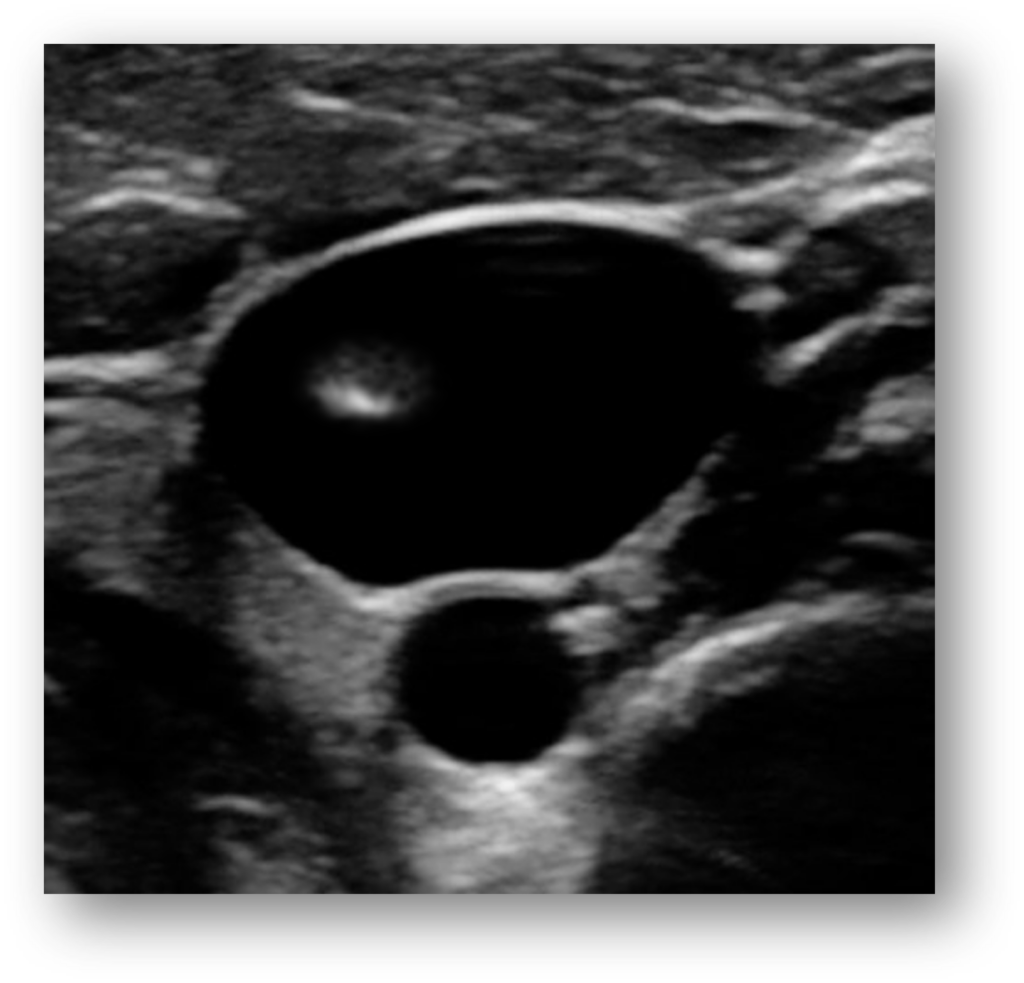
In-plane needle guidance: when the needle is inserted directly parallel to the ultrasound beam, with the needle's shaft being seen as an echogenic white line.
When guiding a needle using the in-plane approach, make sure that you are positioned directly in the center of the face of the probe as you advance the needle. If you are positioned too far off to any one side, you risk potentially not being able to see the needle.
- Begin your guidance at the center of the long access of the vessel, as opposed to the edges. The advantage of this: if your needle goes slightly off-plane, it will still be firmly located within the vessel.
- Cut the image diagonally to help determine what angle you should use to insert the needle. Angles that are closer to 90 degrees off of the ultrasound beam will result in better visualization. But remember the more vertical your approach, the more difficult it will be to visualize the needle.
- If you have inserted the needle in-plane and still are not able to see the tip, hold the needle still, then slowly sweep the transducer from side to side until you are firmly in line with the needle.
Tips for optimizing your out-of-plane needle guidance approach:
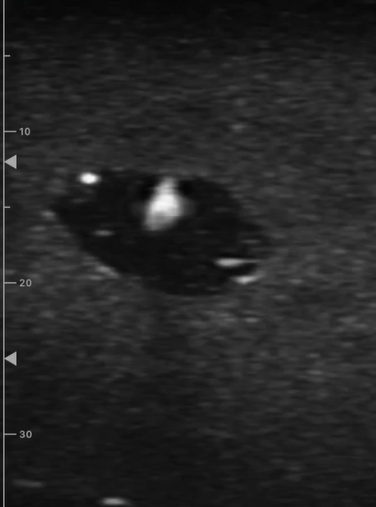
Out-of-plane needle guidance: when the needle is inserted directly perpendicular to the plane of the ultrasound beam.
Keep track of where the needle is located at all times. To start, implement a "stepping technique" by placing the vessel in the center of the image, lining up the needle in the middle of the probe, then inserting the needle until you see the tip. Move the probe away from the needle and survey ahead of it, advancing the needle further until it shows up on the image again. If you feel as though you are on the shaft of the needle and not the tip, simply pull the needle back until it disappears, then start stepping forward again.
Make sure that the needle remains positioned more horizontally for the superficial part of the vessel and is positioned more vertically for the deeper part of the vessel.
- In order to obtain a better reflection of the needle when performing an out-of-plane approach, adjust the probe towards the needle, so that the angle between the needle and the probe is at 90 degrees - this will provide the brightest reflection of the needle tip possible. Remember to also decrease the dynamic range and frequency, which can also help you to visualize the tip even better.
- To locate the needle tip in an out-of-plane approach, slowly sweep the transducer "away" from the needle, until the echo disappears. Then slowly sweep back toward the needle until the tip is identified.
Aseptic Non-Touch Technique (ANTT):
ANTT is a set of principles and procedures used to prevent the spread of infection during invasive medical procedures. ANTT is particularly important during vascular access procedures, which carry a risk of introducing bacteria or other pathogens into the bloodstream, which can lead to serious infections.One of the primary goals of ANTT is to minimize the risk of infection by creating a sterile environment around the patient and using sterile equipment and techniques. This can be accomplished by utilizing several key steps, including:
- Hand hygiene: all healthcare professionals performing the vascular access procedure should wash their hands thoroughly with soap and water or use an alcohol-based hand sanitizer before starting the procedure.
- Use of sterile equipment: all equipment used during the procedure, including gloves, needles, catheters, and syringes, should be sterile and kept in a sterile field. Healthcare professionals should avoid touching anything that is not sterile.
- Non-touch technique: Healthcare professionals should avoid touching the insertion site or any other sterile equipment with their bare hands. Instead, they should use sterile gloves, forceps, or other tools to handle sterile items. 8 9 10 11
Part 3: Thorough Post-Procedure Probe Care:
Ensuring that your transducer receives proper care post-procedure is another crucial step in making sure that your ultrasound-guided vascular access procedures remain safe for your patients. There are a variety of different steps that healthcare personnel can follow to better ensure their probes’ care.Cleaning and disinfecting your ultrasound transducer after procedures:
- Cleaning and disinfecting the transducer after each use, avoiding alcohol-based disinfectants and wipes.
- Dry the probe of any residual gel that is left on the transducer (including in any nooks and crannies).
- Performing disinfection in alignment with the probe manufacturer and disinfectants' IFUs, in order to ensure proper reprocessing (for more information on ways that you can ensure your probes receive proper disinfection, check out our blog post, "Top Tips for High-Level Disinfection").
- When rinsing, make sure not to expose the transducer's system connector to moisture.
- Evaluating the transducer and cord for damage, replacing broken probes as needed.
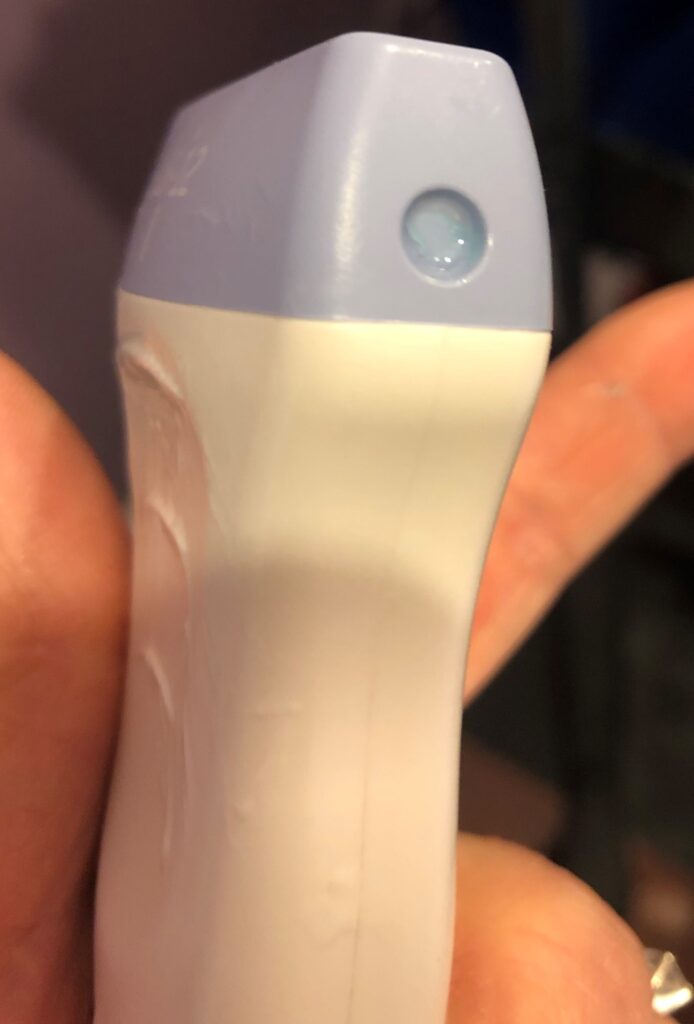
Being on the lookout for probe defects:
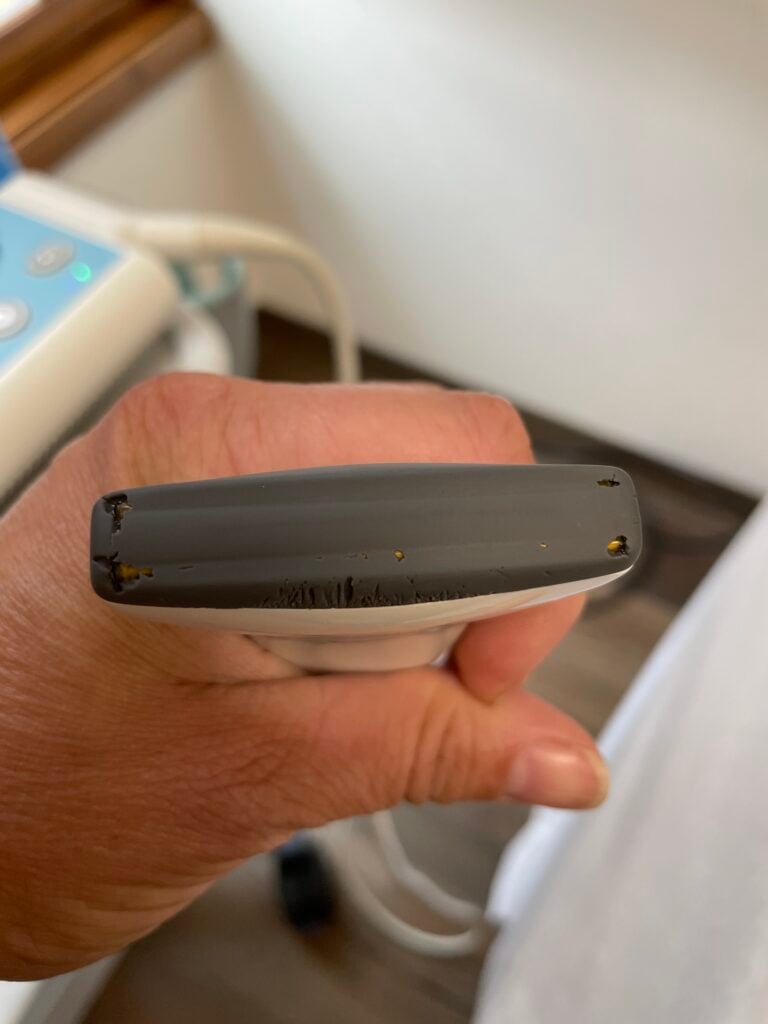
Always be on the lookout for defects in your ultrasound probes. It's important to remember that bacteria can, and often will, reside in even the smallest holes, nooks, and crannies of your transducers. To ensure that your probes - and patients - remain safe from contamination, be sure to do the following before and after procedures:
- Check the probe for any seam separation or cracks in the casing of the probe.
- Scan the lens of the probe for punctures, perforations, or delamination.
- Inspect the strain relief (the area of the probe casing that connects to the cord) for dryness.
- Check the cord of the machine for tire-damage.
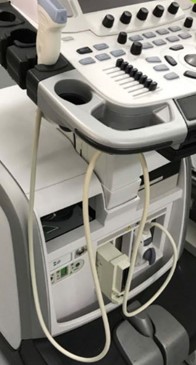
Handling and storing your probes properly:
In recent years, the importance of maintaining proper handling and storage of one's ultrasound probes post-high-level disinfection is something that has received added emphasis by many organizations, including the Joint Commission and AIUM. To help keep your probes safe from potential damage, consider the following "Do's" and "Don't's" whenever handling or storing your transducers:
Do's:
- Do hold the probe by the body when handling.
- Do keep the probe's cord off the floor.
- Do place probes in holders/storage cabinets when not in use.
- Do store your probe in a safe, secure location.
Don'ts:
- Don't hold the probe by the cord
- Don't let the cord get run over by the wheels or drag along the floor
- Don't place probes on beds, tables, or chairs when not in use.
- Don't hang the probe up by its cord.
Part 4: Leveraging Advanced Techniques and Technologies for Optimal Safety:
In recent years, an influx of advanced techniques and technologies have served to significantly improve patient outcomes and reduce the risk of complications during vascular access procedures. Examples included ultrasound-guided peripheral nerve blocks and regional anesthesia, both of which have become widely accepted techniques that offer better accuracy and reduced complications, while also allowing clinicians to better identify the location of nerves and blood vessels with high precision, minimizing the risk of damage to surrounding tissues 12
In addition, needle guidance systems and smart needles have revolutionized the field of vascular access. Needle guidance systems provide real-time feedback to clinicians, helping them to navigate complex anatomical structures and avoid accidental puncture of blood vessels or nerves. Smart needles, on the other hand, use advanced sensors to detect changes in tissue and pressure, providing clinicians with valuable information about the location of blood vessels and nerves. By using these advanced techniques and technologies, clinicians can achieve better patient outcomes and reduce the risk of complications during vascular access procedures. 13 14
Elevate Your Ultrasound Procedures' Safety with CIVCO
Maintaining patient safety during ultrasound-guided vascular access procedures is crucial for preventing potential complications. Proper preparation, optimizing needle guidance approaches, and adhering to aseptic technique principles are all critical steps that healthcare professionals can and should take to ensure patient safety. Additionally, effective disinfection, careful handling and storage of probes, and regular inspection of equipment are essential measures that can help to minimize the risk of infection and other complications.
Bottom line: it is essential to prioritize patient safety at all times. By following these guidelines, healthcare professionals can achieve safer and more effective ultrasound-guided vascular access procedures.
To learn more about how you can achieve safer ultrasound-guided vascular access procedures, visit CIVCO.com (and don’t forget to check out Envision, our gel-less method for ultrasound that is designed specifically to make your procedures even safer and more efficient).
References:
- Maecken, T., & Grau, T. (May 01, 2007). Ultrasound imaging in vascular access. Critical Care Medicine, 35.
- AIUM Practice Parameter for the Use of Ultrasound to Guide Vascular Access Procedures, 2019
- Central venous access: Device and site selection in adults. UpToDate: https://www.uptodate.com/contents/central-venous-access-device-and-site-selection-in-adults
- Vascular Access Devices (VADS): https://www.ons.org/sites/default/files/publication_pdfs/II.%20VASCULAR%20ACCESS%20DEVICES%20(VADS).pdf
- Lai N. M. Lai N. A. O'Riordan E. Chaiyakunapruk N. Taylor J. E. & Tan K. (2016). Skin antisepsis for reducing central venous catheter-related infections. Cochrane Database of Systematic Reviews N7 (20160713). https://doi.org/info:doi/10.1002/14651858.CD010140.pub2
- Culp W. C. Yousaf M. Lowry B. & McCowan T. C. (2008). Pain and efficacy of local anesthetics for central venous access. Local and Regional Anesthesia 11–5.
- Hudson T. L. Dukes S. F. & Reilly K. (2006). Use of local anesthesia for arterial punctures. American Journal of Critical Care : An Official Publication American Association of Critical-Care Nurses 595–9.
- Clare S. & Rowley S. (2018). Implementing the aseptic non touch technique (antt®) clinical practice framework for aseptic technique: a pragmatic evaluation using a mixed methods approach in two london hospitals. Journal of Infection Prevention 6–15. https://doi.org/10.1177/1757177417720996
- Aseptic non-touch technique: a guide for healthcare workers: https://www.health.tas.gov.au/__data/assets/pdf_file/0017/86120/ANTT_V2_2015_B_and_Wprint.pdf
- Aseptic Non Touch Technique (ANTT) – The Northern Ireland Regional Infectoin Prevention and Control Manual: https://www.niinfectioncontrolmanual.net/antt
- Aseptic non-touch technique (ANTT) – SickKids: https://www.aboutkidshealth.ca/article?contentid=3391&language=english#
- Bhoi S. Chandra A. & Galwankar S. (2010). Ultrasound-guided nerve blocks in the emergency department. Journal of Emergencies Trauma and Shock 82–8. https://doi.org/10.4103/0974-2700.58655
- Chew S. C. Beh Z. Y. Hakumat Rai V. R. Jamaluddin M. F. Ng C. C. Chinna K. & Hasan M. S. (2020). Ultrasound-guided central venous vascular access—novel needle navigation technology compared with conventional method: a randomized study. The Journal of Vascular Access 26–32. https://doi.org/10.1177/1129729819852057
- Vucevic M. Tehan B. Gamlin F. Berridge J. C. & Boylan M. (1994). The smart needle. a new doppler ultrasound-guided vascular access needle. Anaesthesia 889–91.


